
3D Printing Earrings
My girlfriend, Rachel, and I have our anniversary on April 23rd. April 23rd is pretty close to my birthday, April 2nd, so Rachel also makes us celebrate our mid-year anniversary on October 23rd, since it’s close to her birthday. That way I spend October being stressed about making her two gifts, and she spends April being stressed about making me two gifts. This year, Rachel had been strongly hinting to me that she wanted a pair of earrings, as she lost the back to the last pair I got her (the part that holds it in place). Of course, I didn’t want to just get her another pair of boring old earrings… So I set out to make my own.
It’s actually not that hard to make earrings anymore. Sites like shapeways or i.materialise allow you to upload a 3D model and have it printed in all sorts of materials: gold, silver, brass, plastic, aluminium, brushed steel, you name it. The problem then becomes making a 3D model for the earrings. I know some CAD - but I wouldn’t call myself an expert earring designer. Plus, I want this gift to be personalized to the two of us in some way. It is our anniversary after all. I wanted to take some set of data that the two of us had generated, represent it physically, and have it make a beautiful earring.
Doing this manually would have been a huge pain, so I set out in search of a programmatic CAD program. Something that would let me type code and produce objects. Fortunately, there are others out there with my same need, and such a thing already exists. OpenSCAD is actually, as far as I can tell, the only option. There are ports into Haskell and Javascript, but it’s all based on OpenSCAD. Crucially, this means that if there are things OpenSCAD can’t do, the OpenSCAD wrappers can’t do them either. OpenSCAD has been around for a while though, so it should be fine right?
The data set is easy. Rachel and I communicate almost exclusively through Facebook messenger. I downloaded our complete chat history using Facebook’s “export your data” tool. There were a couple of things I could have done with this. Some sort of textual analysis would have been neat, but it’s hard to represent words at the scale of earrings in any meaningful way. So I threw out the chat content and looked only at the timestamps.
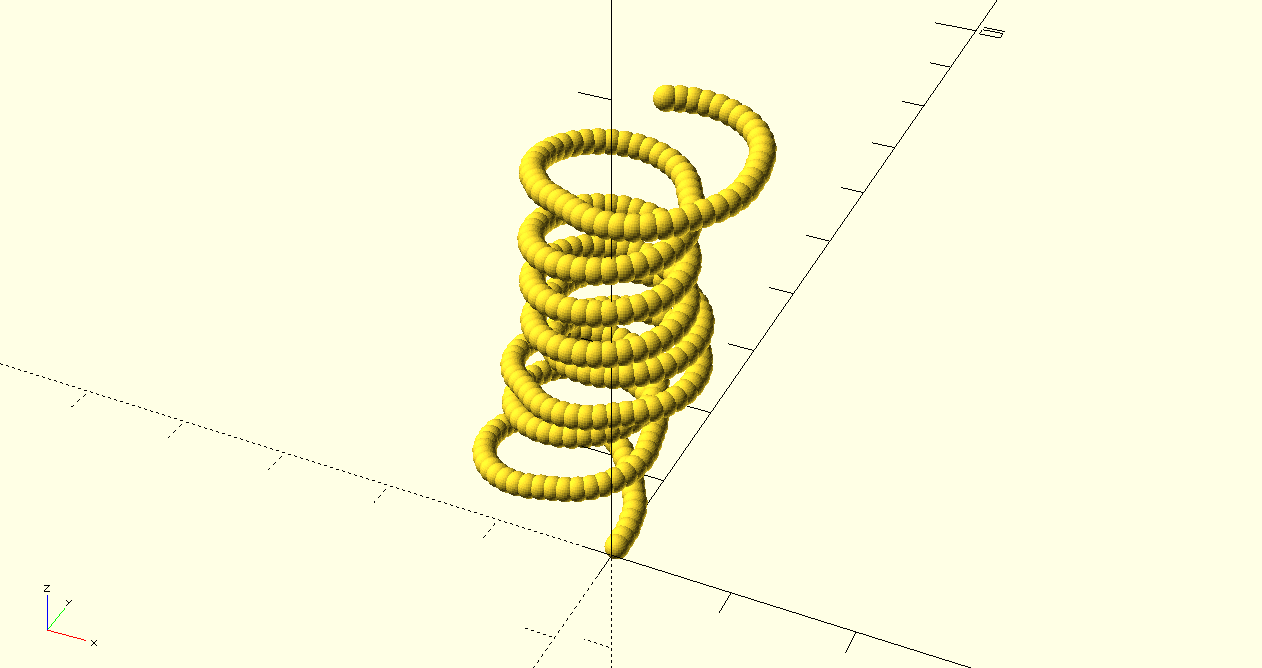
The first thing I tried was creating a sort of timeline. My idea was to create a spiral-like object out of a thousand tiny spheres. The topmost sphere would represent our first ever chat, the bottom our most recent chat, and each intermediary point would represent an hour. If we had chatted during that hour in time, the sphere would “turn” slightly and continue the spiral inwards. If we hadn’t, the sphere would “move straight”. The idea was to have the earring represent a timeline of our chat history: curving when we had chatted and a straight line when we hadn’t.
So I set out to work. After several hours of playing around with OpenSCAD and consulting the cheat sheet numerous times, I had arrived at a prototype.
module point(turns, idx  = 0) {
    translate_vec = [ 0, 0.1, 0.01 ];
    deg = 10;
    r = 0.1;
    fn = 30;
    if (idx < len(turns)) {
      if (turns[idx]) {
          translate(translate_vec) {
            sphere(r, $fn=fn);
            point(turns, idx + 1);
          }
      } else {
          rotate(deg) {
              translate(translate_vec) {
                sphere(r, $fn=fn);
                point(turns, idx + 1);
              }
          }
      }
    }
}

point( [ true, true, false, true, false .... ]);
Roughly speaking it works like this: turns is an array of boolean values, representing whether or not we chatted in that hour. translate_vec, and deg are constants that represent how much to move forward and how much to turn respectively. First we check if the current value in turns. If true, we move forward (translate(translate_vec)), draw the sphere representing this hour (sphere(r, $fn=fn)), and recursively call ourself, advancing idx by one. If the value in turns is false, we do the same thing, but also first rotate ourselves inward by deg (rotate(deg)). This works because in the recursive call our new state is the transformed old one, so all these transforms and rotates stack.
The first immediate problem was one of magnitude. We are celebrating our one and a half year anniversary, which obviously means a lot of hours. 13,370 to be exact. And since every hour has it’s own sphere, that means 13,370 spheres. OpenSCAD can handle tens of thousands of objects, but what I found out is that it cannot handle tens of thousands of nested rotates. I got about a couple hundred to render, but if I started trying to go past 1,000 OpenSCAD would crash on me inexplicably. With some googling I discovered the OpenSCAD has a hardcoded maximum recursion depth of several thousand. OpenSCAD does support tail recursion elimination, but I don’t think this code can be refactored to work with tail recursion elimination, since you need to keep all those previous rotates and translates in memory. So that option was out the window….
It did get me an example of the first several hundred hours of hour chats though:
Remember what I said earlier? If I can’t do it in OpenSCAD, I won’t be able to do it in any of the alternatives either. They all compiled to OpenSCAD, which would still be limited by the maximum recursion depth…
The problem isn’t the number of objects, it’s the fact that OpenSCAD has to keep track of all the previous rotates and transforms. If I could hand a precomputed list of positions to OpenSCAD it would work fine. I just needed to do my own rotate and transform math ahead of time and simplify OpenSCAD into a rendering engine. Time for some quick maths:
def normalize(total, vec):
  length = sqrt(vec[0] ** 2 + vec[1] ** 2)
  scale = total / length
  return [ comp * scale for comp in vec ]

with open('earring_points.scad', 'w') as scadfile:
  vel_scale = 0.03
  accel_scale = 0.1
  pos_vec = [ 0, 0, 0 ]
  vel_vec = [ 0, vel_scale, 0.0005 ]
  accel_vec2D = [ 0, 0 ]
  scadfile.write('r = 0.1;\nfn = 15;\n') # r is radius and fn is a special openscad variable meaning number of sides to render the sphere with
  for chatted in chattedList: # chattedList is list of boolean values indicating if we chatted or not at that hour
    if chatted:
      accel_vec2D = [ 0, 0 ]
    else:
      x, y, _ = vel_vec
      accel_vec2D = [ -1 * accel_scale * y, accel_scale * x ]
    new_vel_vec2D = [ prev_vel_comp + accel_comp for prev_vel_comp, accel_comp in zip(vel_vec, accel_vec2D) ]
    new_vel_vec2D = normalize(vel_scale, new_vel_vec2D)
    vel_vec = new_vel_vec2D + [ vel_vec[2] ]
    pos_vec = [ old_pos_comp + vel_comp for old_pos_comp, vel_comp in zip(pos_vec, vel_vec) ]
    scadfile.write('translate({}){{\nsphere(r, $fn=fn);\n}}\n'.format(str(pos_vec)))
Rather than using rotates and transforms, I kept track of a current position vector (initially 0), a velocity vector (initially slightly positive in the y direction), and an acceleration vector (initially 0). From there it was pretty simply. Loop through the hours. If we had chatted, set the acceleration vector to 0. If not, set the acceleration vector to point 90 degrees to the left from the velocity vector. This is what would cause the inward rotation. Add the acceleration vector to the velocity vector, normalize the velocity vector, add the velocity vector to the current position, and we have our new position! Append another simple translate-and-place-sphere OpenSCAD command to an output file, and in the end we have 13,370 spheres ready for rendering. The ‘compiled’ file looked something like this:
...
translate([0.0, 0.09, 0.0015]) sphere(r, $fn=fn);
translate([-0.0029851115706299673, 0.11985111570629967, 0.002]) sphere(r, $fn=fn);
translate([-0.005970223141259935, 0.14970223141259933, 0.0025]) sphere(r, $fn=fn);
...
After some playing with parameters, this actually resulted in something respectable!
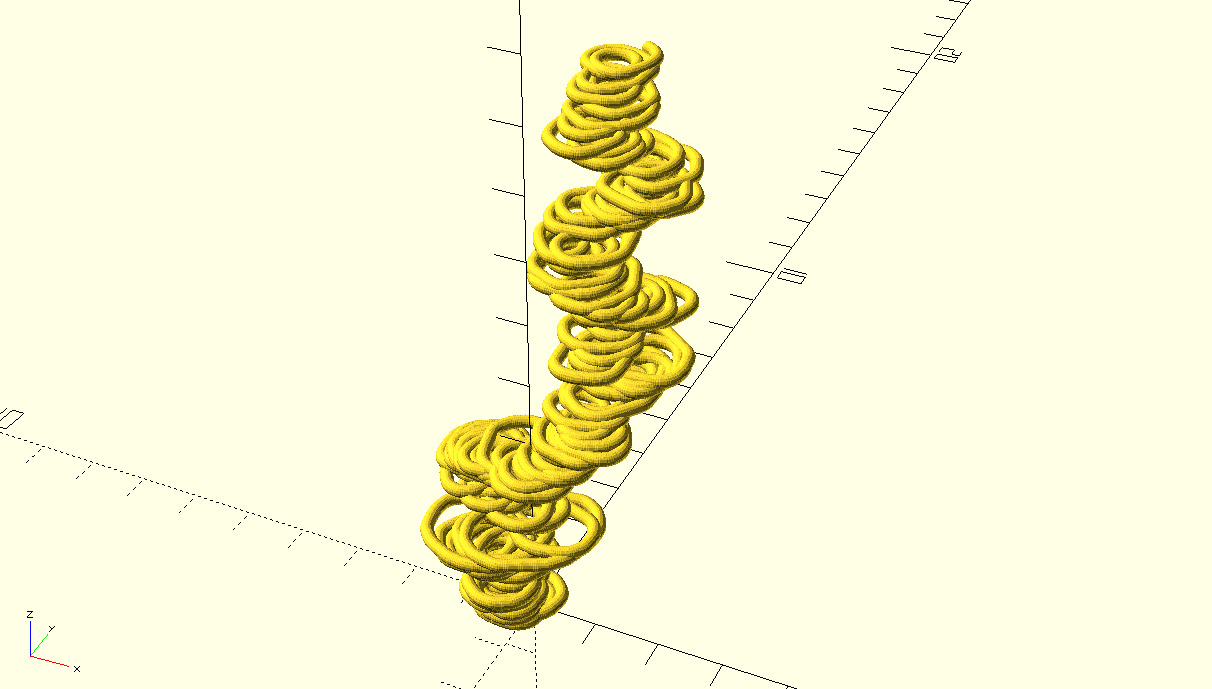
At this point I had labored for ten plus hours over the course of two days. Every time I had free time I would pull out my laptop and keep working on it. Getting this to render for the first time was amazing. But as I looked at it my heart sank. Yes, it was a representation that was special to us. Yes, it could be worn as an earring. But it wasn’t… beautiful. It wasn’t stylish. It looked like a lump of spaghetti.
I would have to try something else.
I actually talked to Rachel that same night I got the first render. I casually asked her what type of earrings she might like. “Oh, something small and elegant” she said. “Soooo, hoop earrings wouldn’t be good? Or like a spiral or something?” “No, just a nice stud or something would be nice.”
Welp.
I analyzed the data for other patterns. Throwing it into an iPython notebook I found for every hour of every day of the week how many times we chatted each other on average. My idea was now to divide a sphere into seven slices around the center (like an orange slice) and divide each slice into twenty four pieces from top to bottom. This gives me a section for ever hour of the day, every day of the week. Finally, I would scale the radius of the section relative to the average number of chats we send. So if we chat more, the section would pop out further, and if we chat less, it would be closer to the center of the sphere.
This was my first attempt:
weeks = [[1.5015282609704514, 1.674979870761565, 1.6077997753497308, ... ], [1.0876480610118007, ... ],  ... ];
sig_angles = [ for (i = [0 : 180/24 : 180]) i ];
theta_angles = [ for (i = [0 : 360/7 : 360]) i];
h = 1.5;
l = h * tan(180/24);
w = h * tan(360/7);
for (idx = [0 : len(weeks) - 1]) {
    radii = weeks[idx];
    cur_theta = theta_angles[idx];
    rotate(cur_theta) {
        for (idxx = [0 : len(radii) - 1]) {
            scale(radii[idxx])
              intersection() {
                  cur_sig = sig_angles[idxx];
                  rotate([ 180-cur_sig, 0, 0])
                    polyhedron( points = [ [0,0,0], [0,0,h], [w,0,h], [0,l,h], [w,l,h] ], faces = [ [0,1,2], [0,3,1], [0,2,4], [0,4,3], [1,3,4,2] ]);
                  sphere(r=1, $fn=150);
              }
        }
    }
}
The idea was to intersect a triangular prism that represented my section with a circle, and then scale it up appropriately.
It did not work:
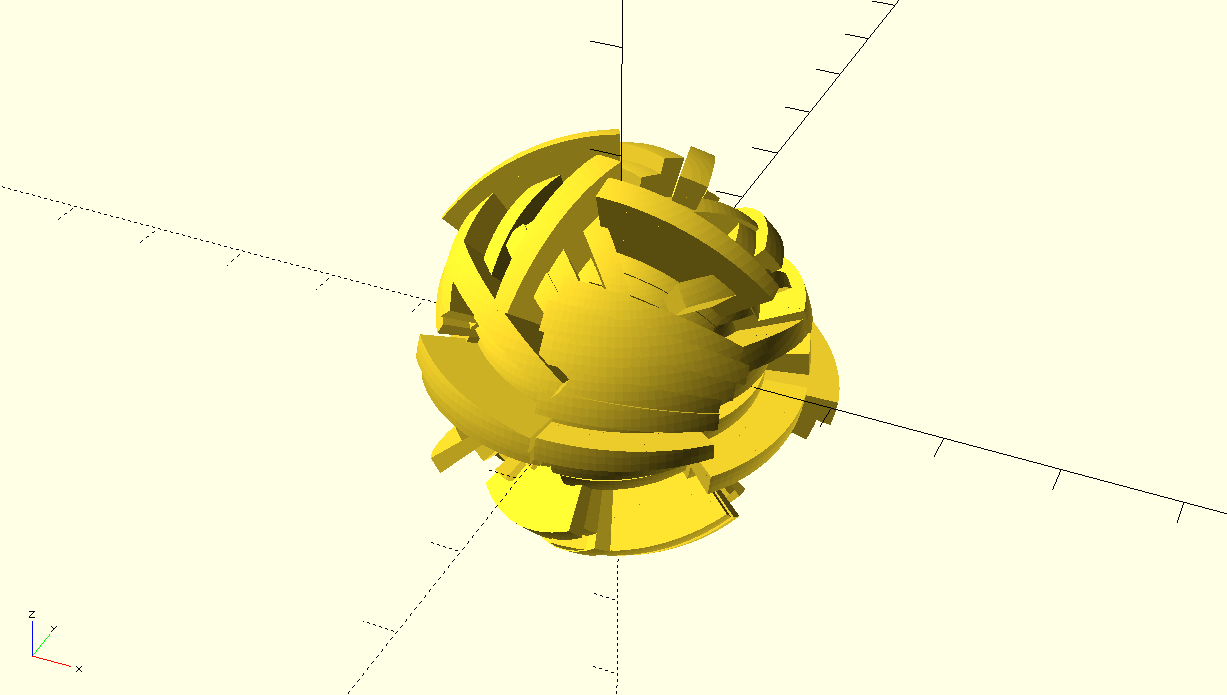
I’m still not 100% sure why it didn’t work.
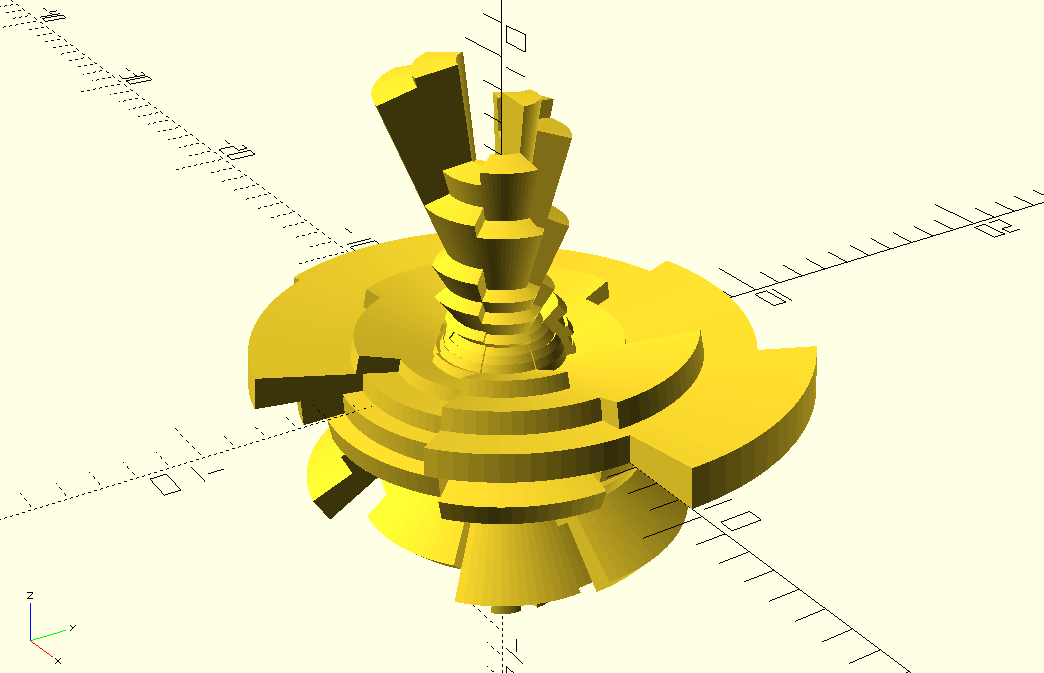
After that, I found out that in the nightly build (which is three years ahead of the apt-get build) rotate_extrude accepts an angle parameter, which allowed me to simplify my code.
function zip(l1, l2) = [ for (i = [0:min(len(l1), len(l2))-1]) [ l1[i], l2[i] ] ];
function flatten(l) = [ for (a = l) for (b = a) b ] ;
function mkpt(phi, r) = [ r * cos(phi), r * sin(phi) ];

radiis = [[0.8682432432432432, 0.3624517374517375, 0.6404440154440154], [0.8494208494208494, 0.734073359073359, ... ] ... ];
min_r = 2;
theta_tick = 180/24;
alpha_tick = 360/7;
alphas = [ for (i = [0:alpha_tick:360]) i ];
ars = zip(alphas, radiis);

for(ar = ars) {
    alpha = ar[0];
    radii = [ for (r = ar[1]) min_r + r ];
    thetas = [ for (i = [theta_tick:theta_tick:180-theta_tick]) i ];
    phis = [ for (theta = thetas) 90 - theta ];
    prrs = [ for (i = [0:len(phis)-1]) [phis[i], radii[i], radii[i+1]] ];
    pts = [ for (prr = prrs) [mkpt(prr[0], prr[1]), mkpt(prr[0], prr[2])] ];
    ptss = concat([[0,radii[0]]], flatten(pts), [[0, -radii[len(radii) - 1]]]);
    rotate(alpha) rotate_extrude(angle=alpha_tick, $fn=100) polygon(ptss);
}
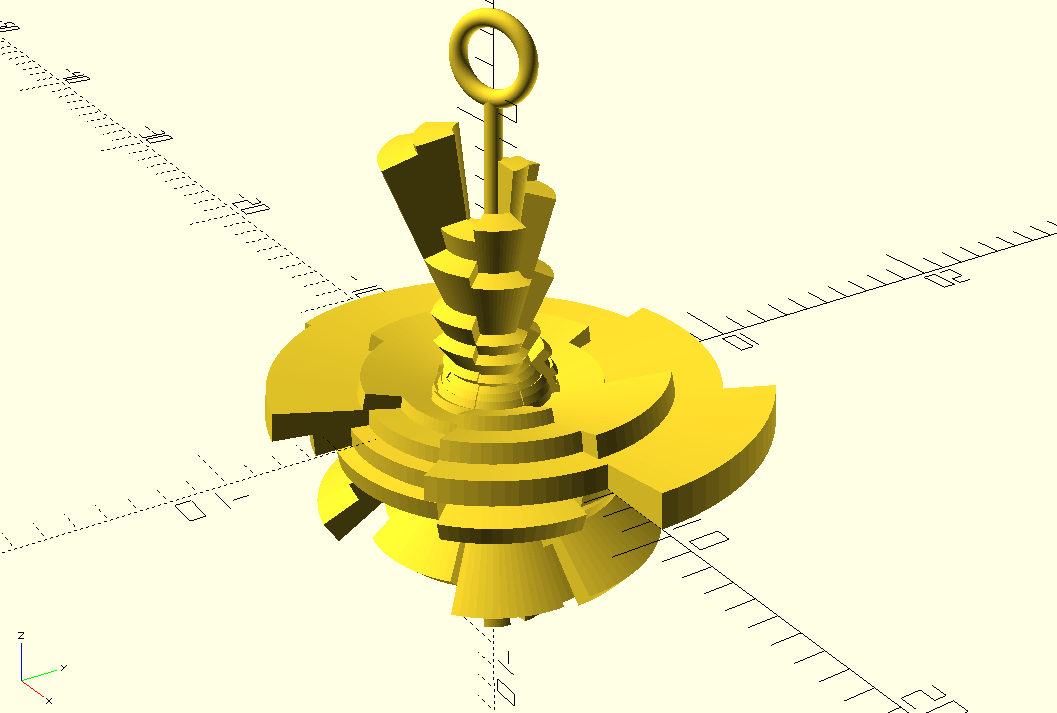
The idea here is to craft a 2D shape that looks like the profile of a slice, and then let rotate_extrude handle turning it into a 7th of a sphere. Combine the all the slices together and bam! You’ve got something that looks pretty cool! I was very pleased with this one. It looks cool, “space age” as my roommate Jo put it. It’s small and elegant. It represents something about our relationship. Very pleased.
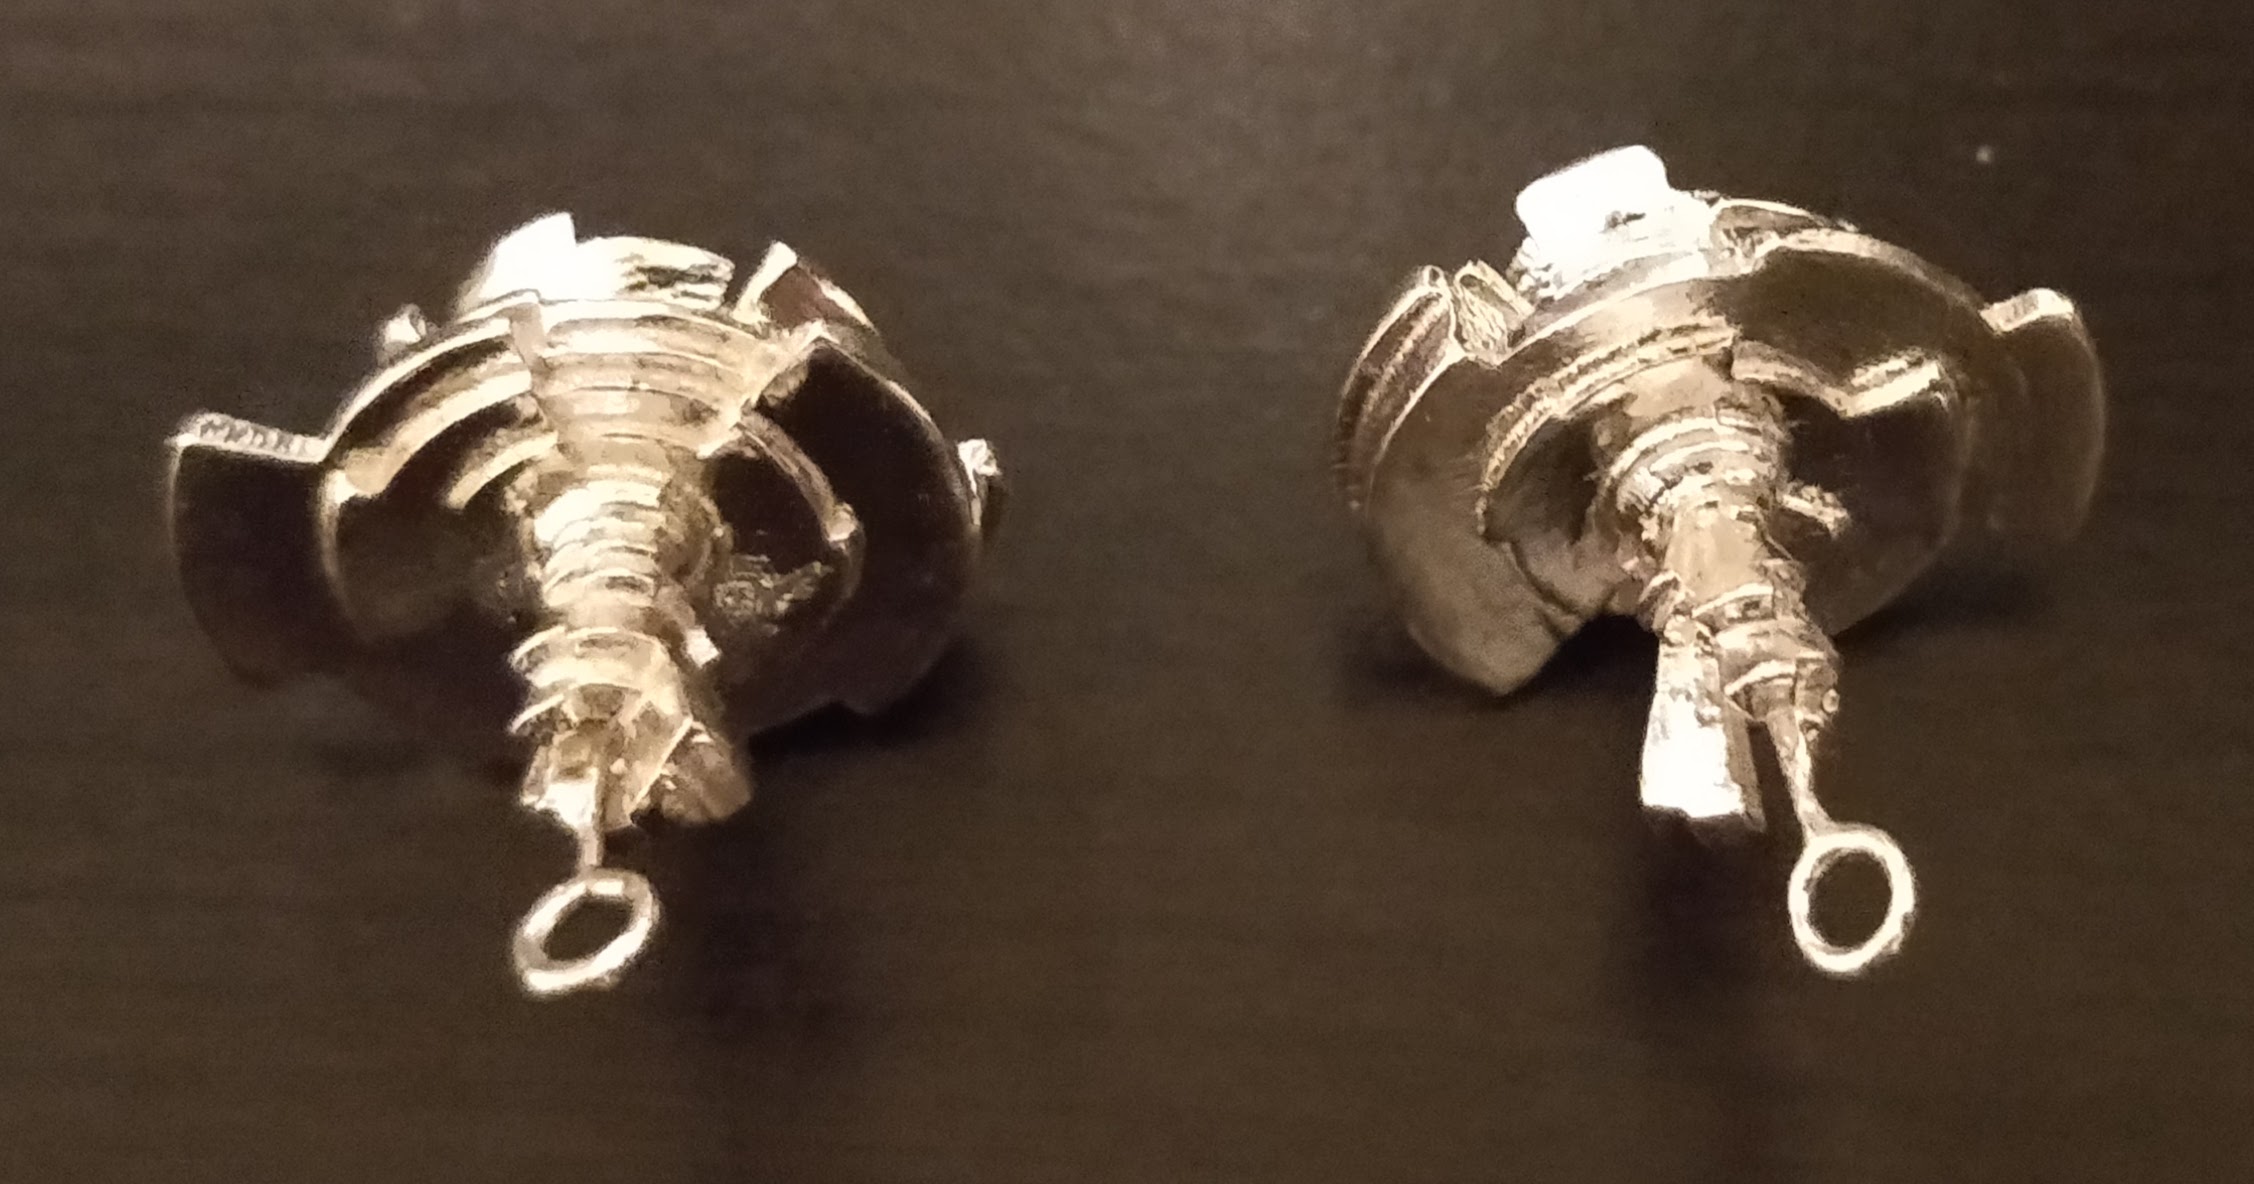
The last problem to solve was making it wearable. To do this, I simply added a little loop that stuck out of the top, with the intention of taking some copper wire (which I already have from a past project), making a hook out of that, and attaching it to the loop.
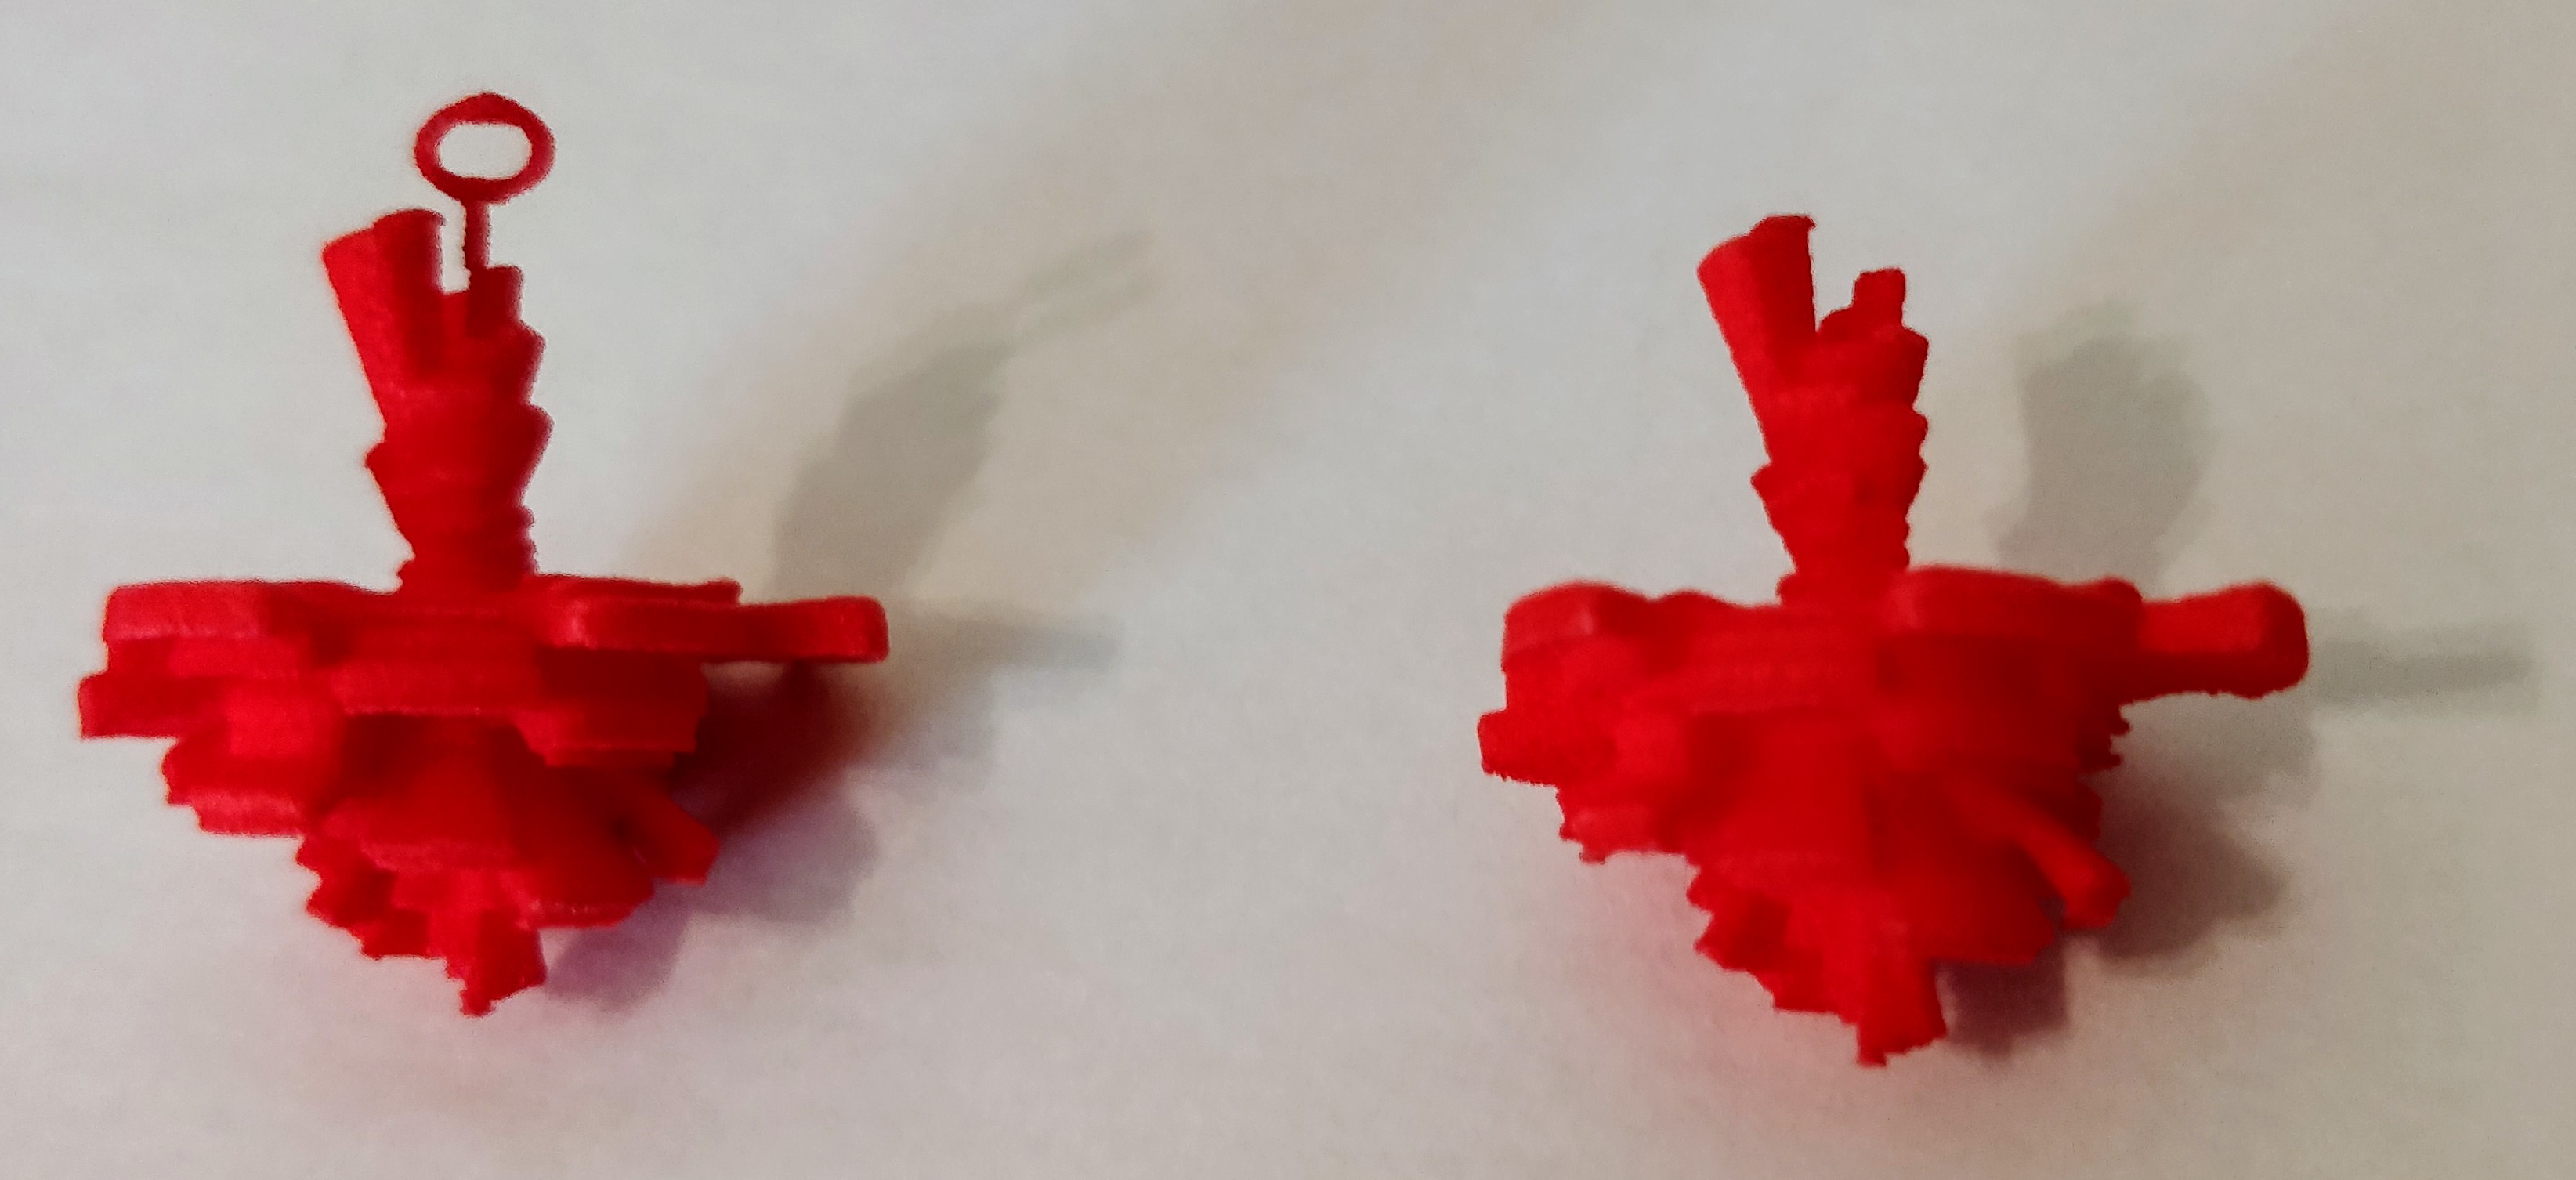
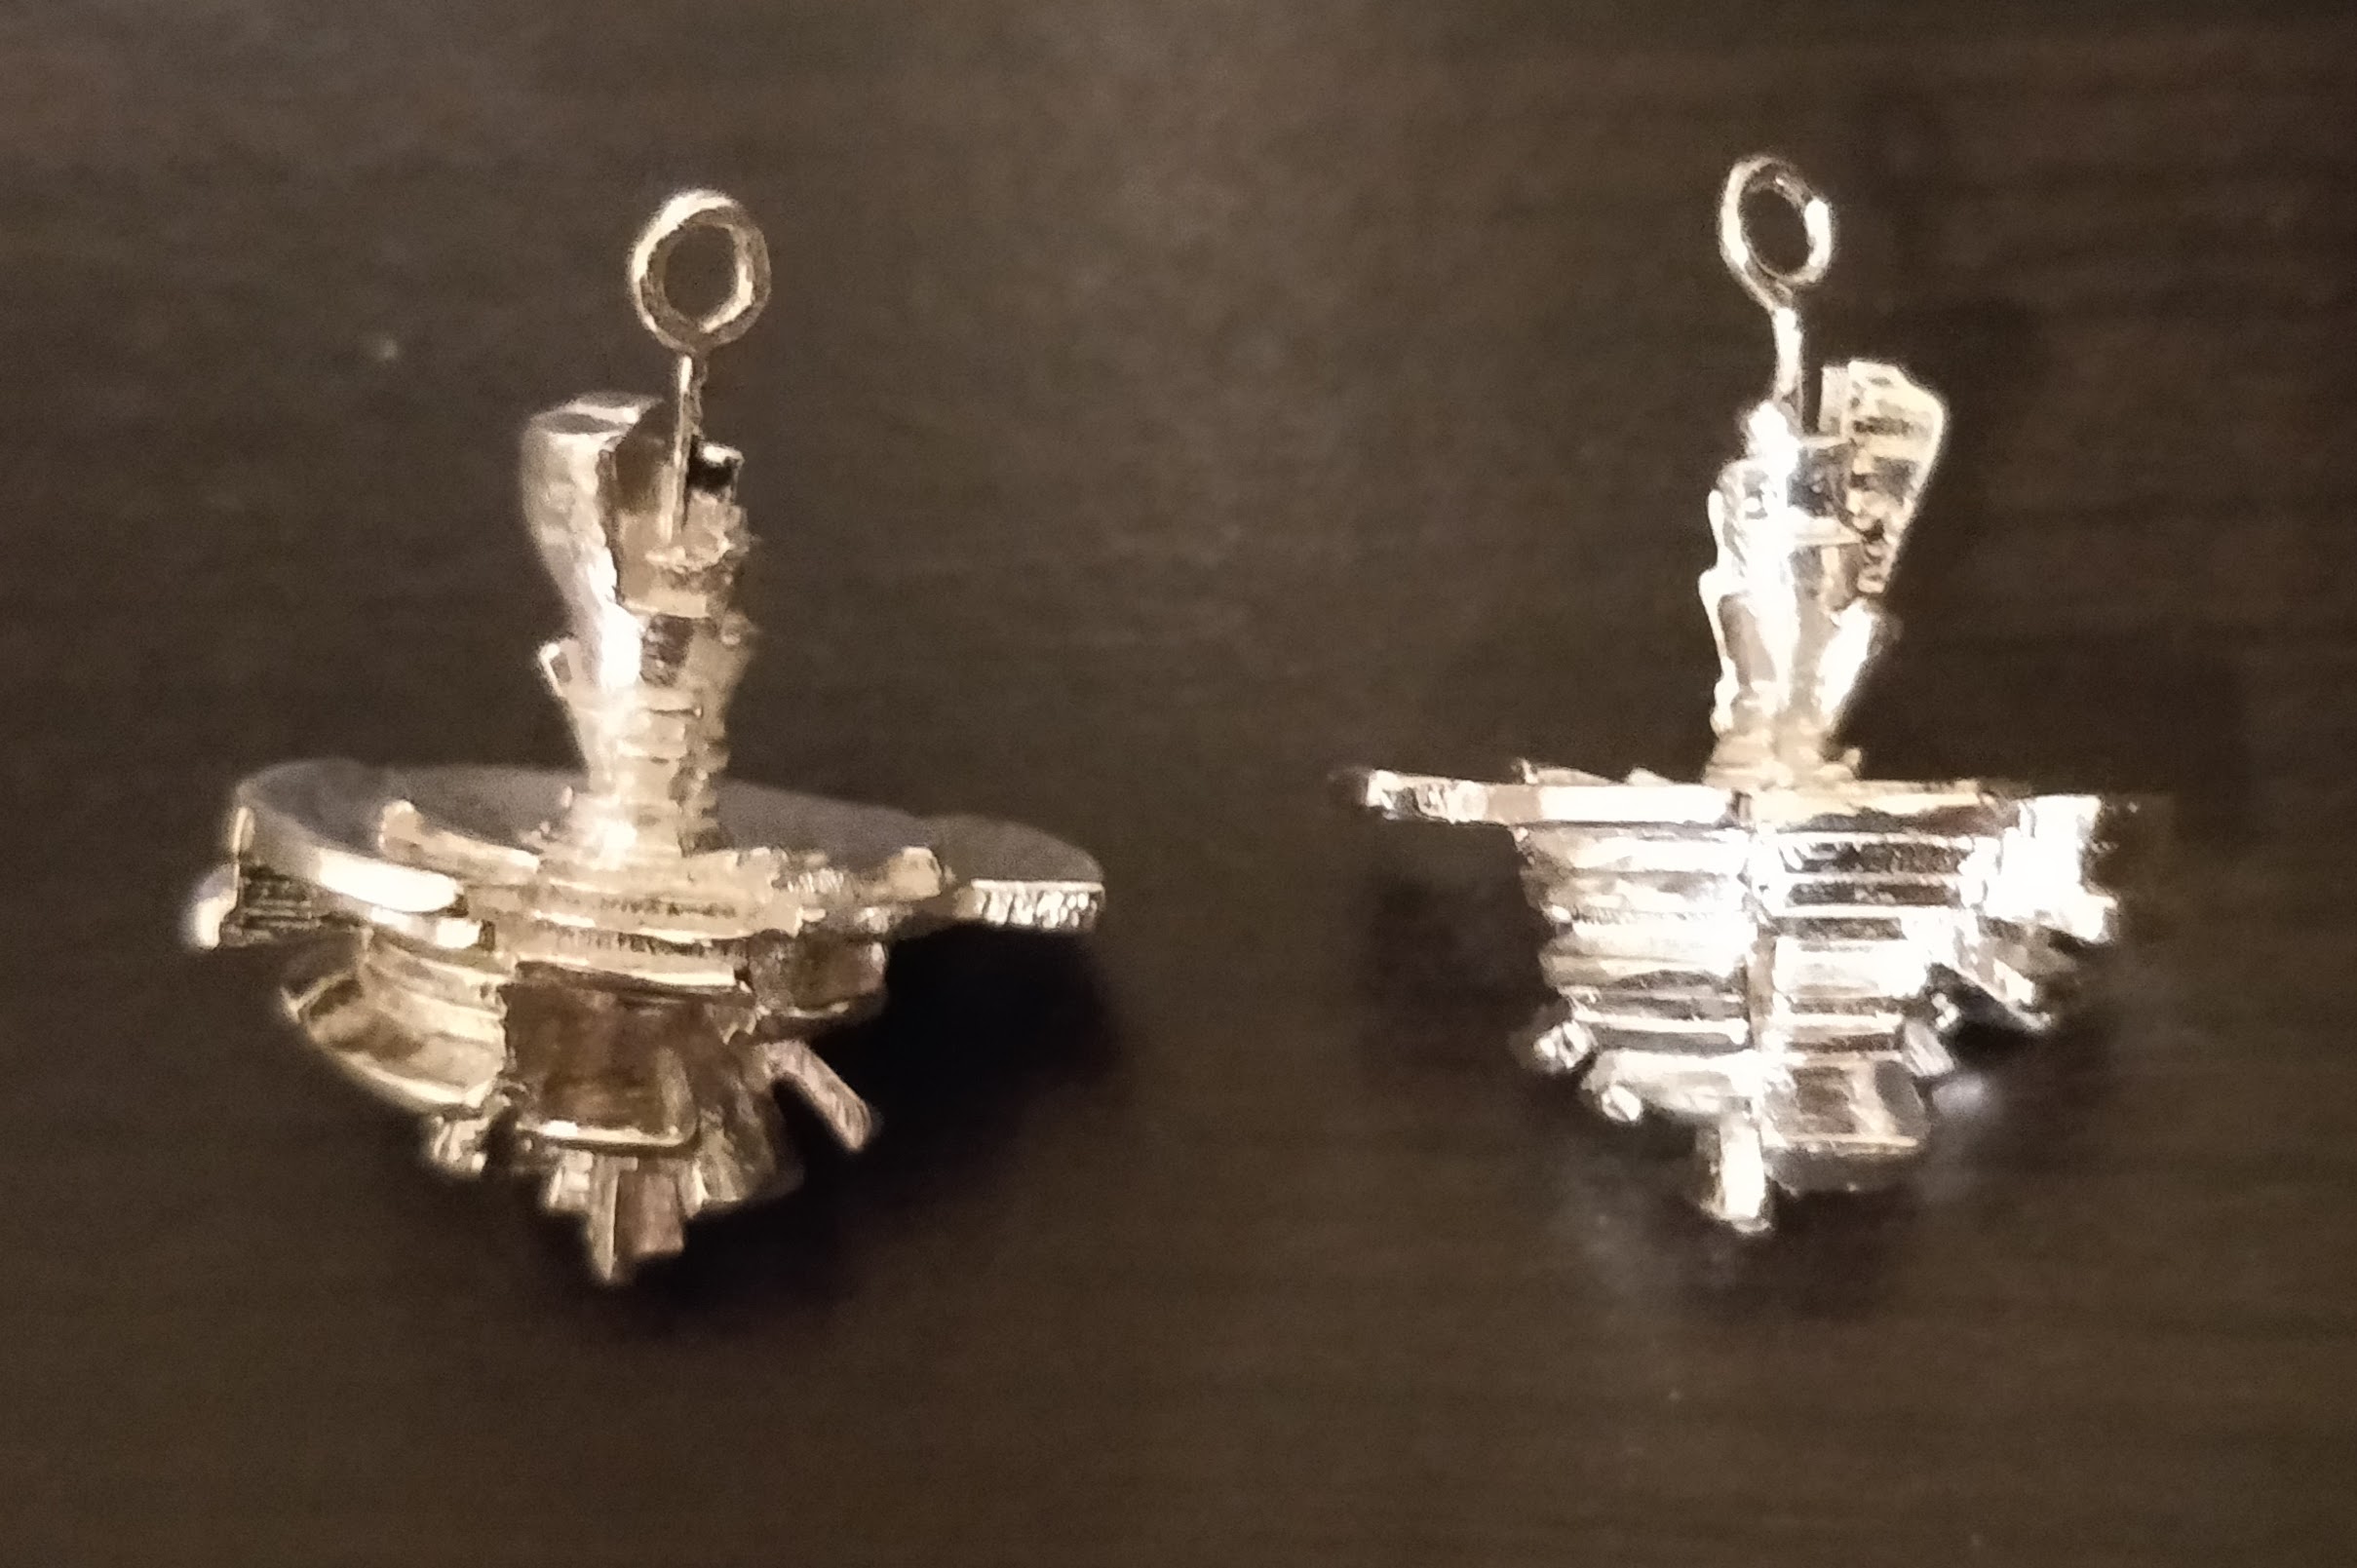
The final hurdle was shapeways. I obviously don’t have a 3D printer that can print silver laying around, and neither does UT. Uploading the file to shapeways, I got told that there were several “structural deficiencies” that I had to fix. Shapeways doesn’t like it when certain layers are too thin, since they might break. Which makes sense. I wanted to just print it and if certain bits break off that’s fine, but after fiddling with the size and radius of some of the pieces, I managed to get it to pass shapeways automated tests. Then off to the printing press! I got two in plastic because those would arrive fast and two in silver to be the actual gift. They were about $60 or so, which I thought was reasonable for what I might spend on earrings for her anyways.
The plastic print: (one of the hoops did indeed break off, but I had printed them with the “print it anyways” option so I knew that was a risk. These ones were only $2 or so.)
A couple of shots of the metal print:
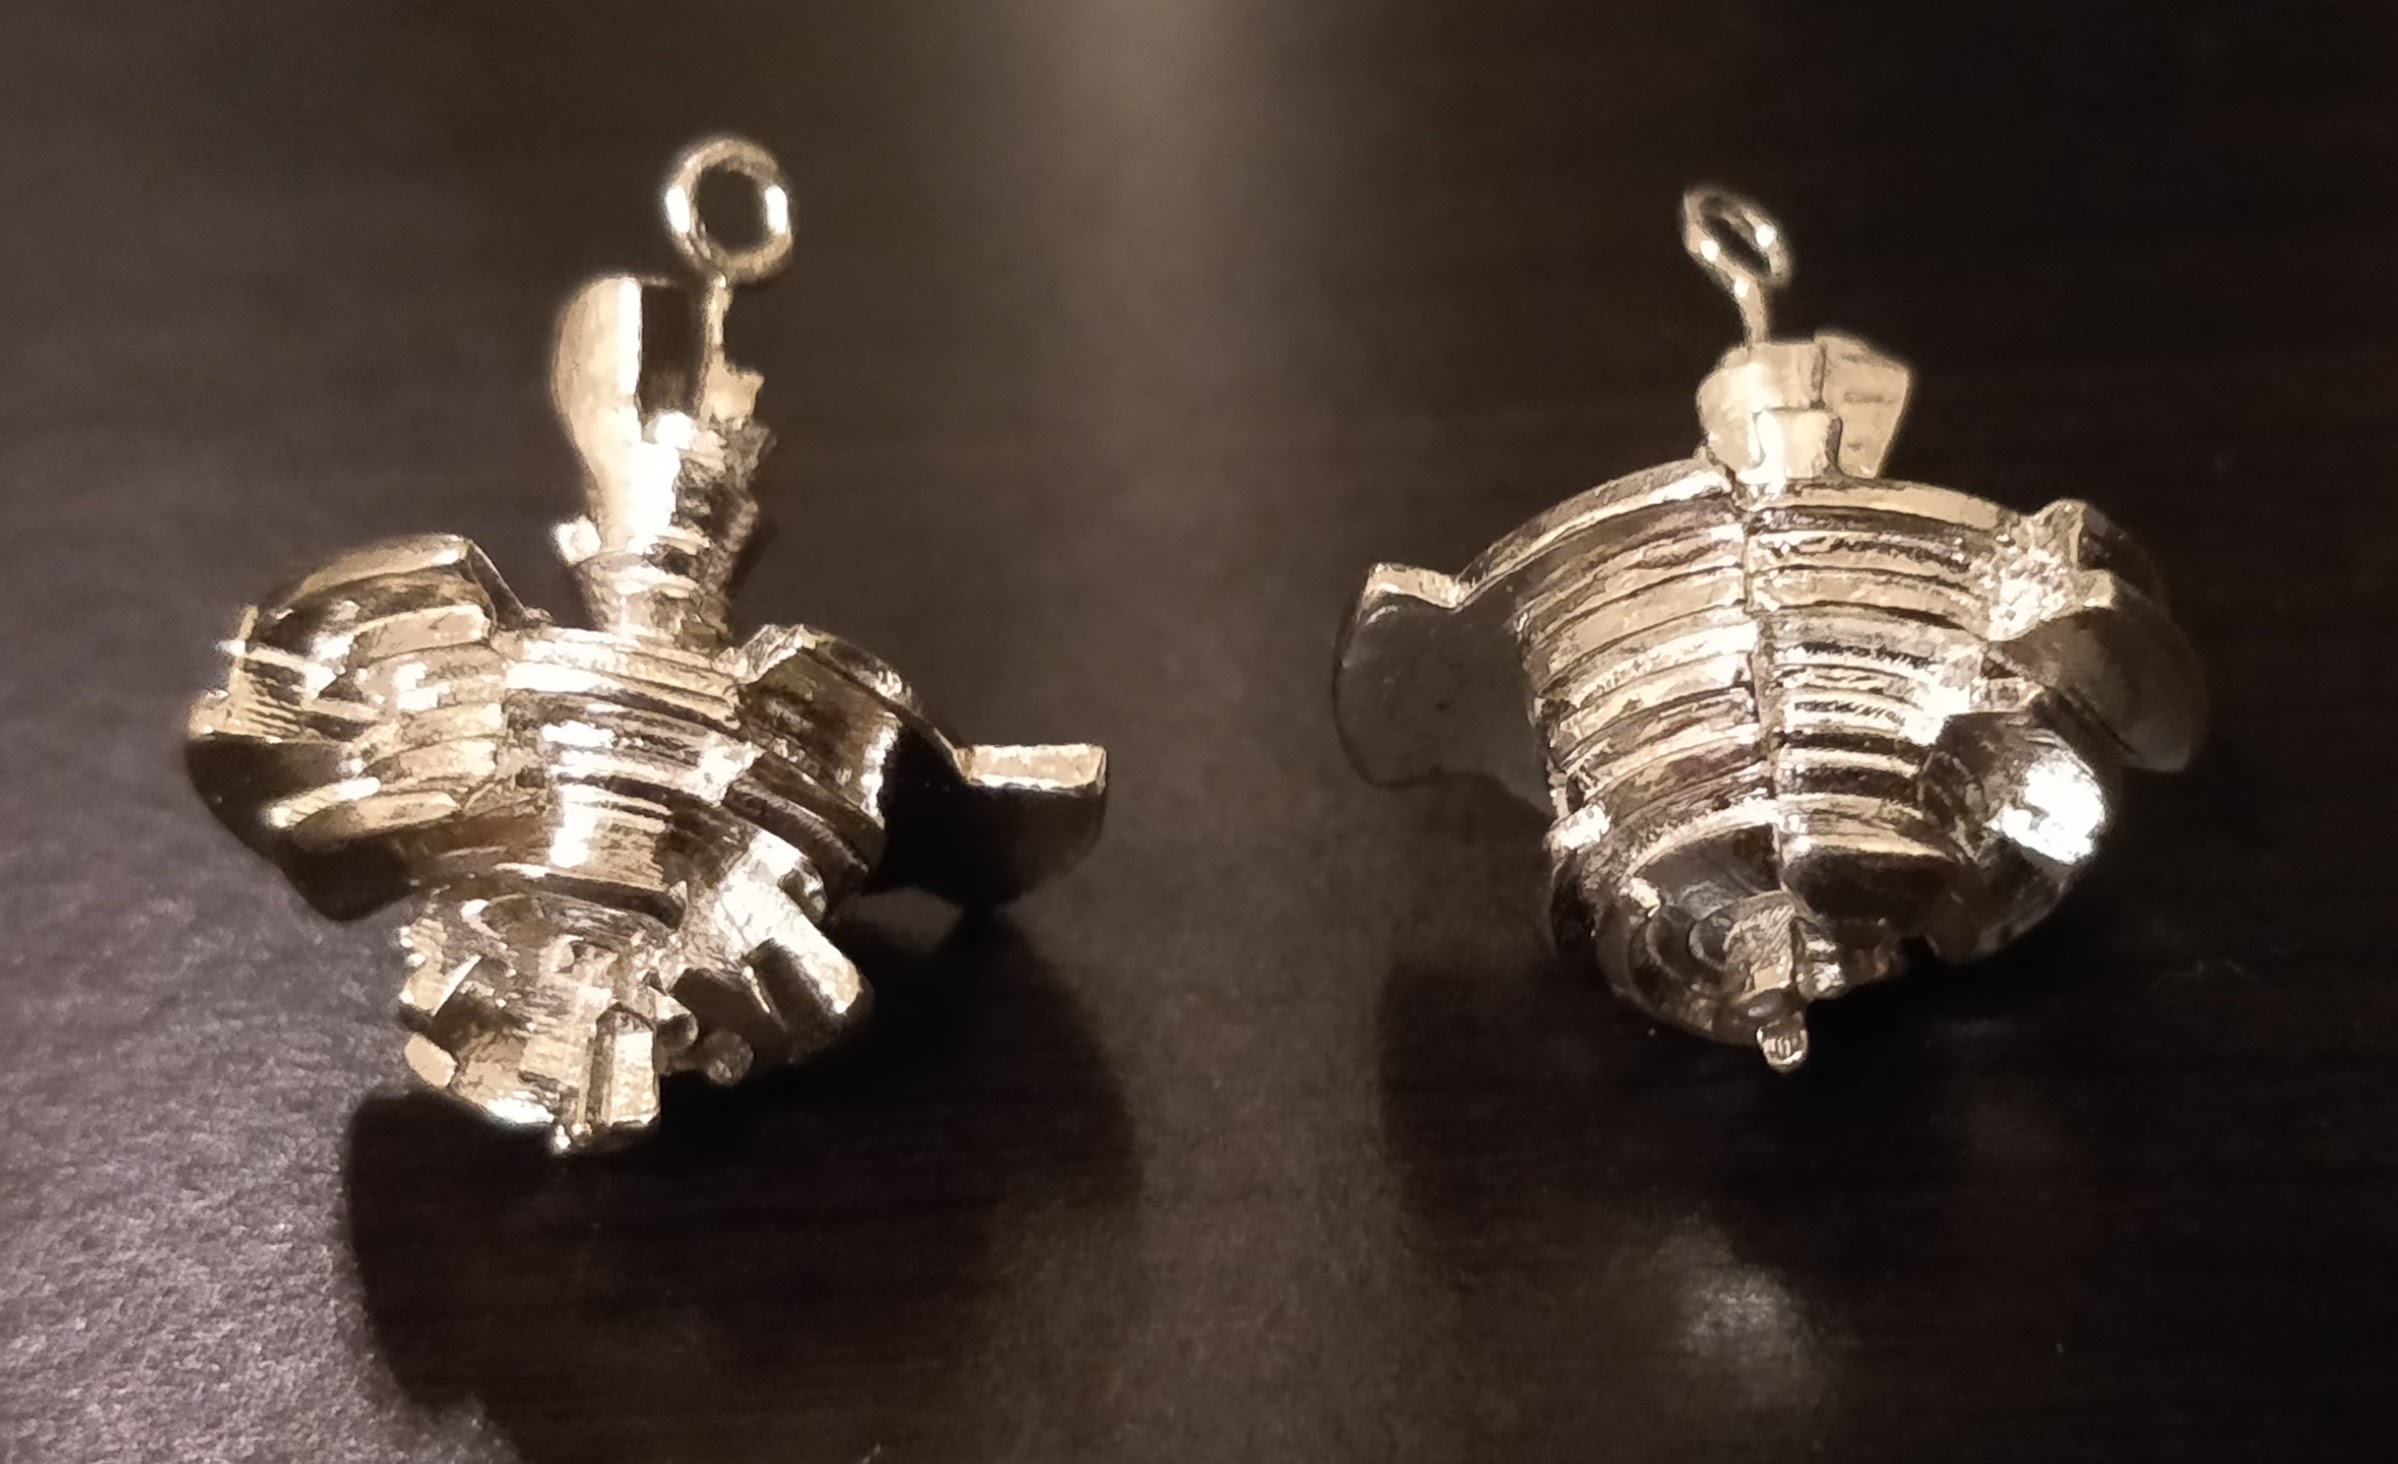
Overall I was super happy with them! Rachel also liked them very much. And if my career in computer science doesn’t work out, maybe I can go into jewlery design 😂